Currently, one of the best ways to start learning SDN networking is to use mininet emulation software with one of the open source SDN controllers. One of solutions is open source controller OpenDaylight and now I will try to present how to install and start this controller and some of its features. If you want to have complete environment for SDN testing you should also have to have installed and configured mininet virtual machine.
So, first step is to download ISO image for server at which OpenDaylight will be installed. One of the possibilities is Ubuntu server which can be downloaded from Ubuntu site:
https://www.ubuntu.com/download/server
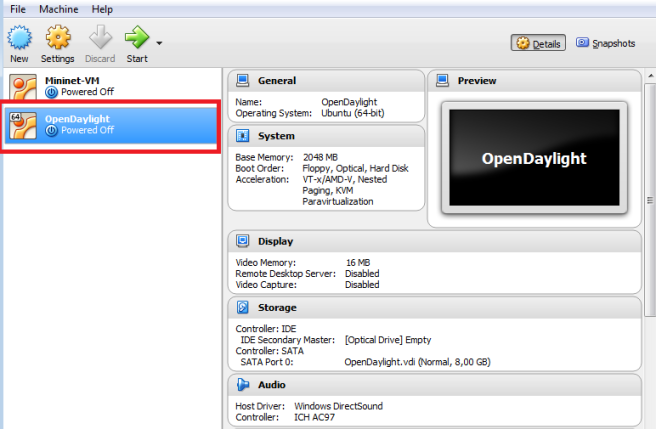
I used VirtualBox virtualization platform for installing OpenDaylight. When I downloaded ISO image I created VirutalBox VM named OpenDaylight with 2G RAM and 8G HD:
When VM is created, initially I have only one network adapter by default which is NAT adapter. To use functionality of OpenDaylight it is necessary to add host-only network adapter which will be used for connection between mininet OpenvSwitch and Opendaylight controller in our SDN environment. So, I added host-only adapter. To do that do right click on virtual machine and go to Settings->Network->Adapter2:

Click OK when adapter is added to apply changes.
Now, to boot our VM from Ubuntu ISO image I should add my Ubuntu ISO image as IDE disk. Do right click on Opendaylight VM and go to Settings→Storage and click on disk icon next to Controller:IDE. Then choose your Ubuntu ISO and it will appear as one of IDE controllers:

Now, power on machine and go through steps to install Ubuntu sever. Ubuntu installation is not part of this article. When installation is finished, restart machine and let us see which network adapters we have. Log in to machine and use commands ip addr show or ifconfig -a to list all network interfaces. After logging and executing command ipconfig -a I got this output:
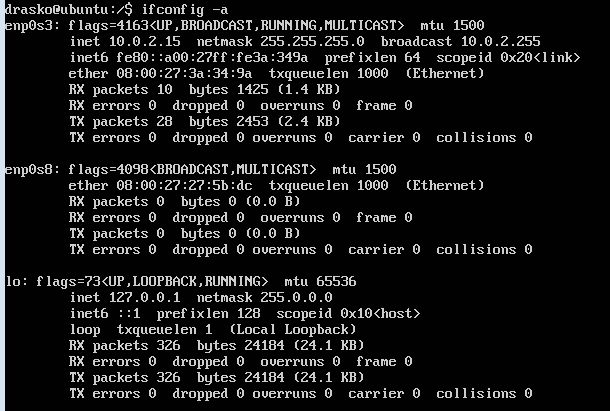
As you can see host only network interface (enp0s8) does not have ip address. To make this interface has ip address we should execute this command:
sudo dhclient enp0s8
and our host only network interface will get ip address from VirtualBox DHCP server. One thing more we should do is to ensure that host only interface will get ip address from DHCP every time when host is rebooted. This can be done by modifying /etc/network/interfaces file form server. First, open file with nano text editor(you can use any other editor also):
drasko@ubuntu:~$ sudo nano /etc/network/interfaces
Then add these lines and save the file:
# the host-only network interface
auto enp0s8
iface enp0s8 inet dhcp
Now, when we have Ubuntu server installed and network interfaces configured, we should install one more prerequisite for OpenDaylight. That is java because OpenDaylight is java based application. To install java execute next two commands:
drasko@ubuntu:~$ sudo apt-get update
drasko@ubuntu:~$ sudo apt-get install default-jre-headless
After that set JAVA_HOME environment variable. To do that we should edit bashrc file. First open it with nano editor:
drasko@ubuntu:~$ nano ~/.bashrc
and add following line to bashrc file:
export JAVA_HOME=/usr/lib/jvm/default-java
then run file:
drasko@ubuntu:~$ source ~/.bashrc
Now we have all prerequisites for OpenDaylight installation and can start with it. To install OpenDaylight controller download it form OpenDaylight web site.In this case we will use Beryllium OpenDaylight distribution which have all features for SDN testing. You can download installation package from your Ubuntu server with get command:
drasko@ubuntu:~$ wget https://nexus.opendaylight.org/content/groups/public/org/opendaylight/integration/distribution-karaf/0.4.0-Beryllium/distribution-karaf-0.4.0-Beryllium.tar.gz
When download is done extract tar file:
drasko@ubuntu:~$ tar -xvf distribution-karaf-0.4.0-Beryllium.tar.gz
When file is extracted you can start controller with executing karaf command (before it enter to distribution-karaf-0.4.0-Beryllium folder):
drasko@ubuntu:~$ cd distribution-karaf-0.4.0-Beryllium
drasko@ubuntu:~$ ./bin/karaf
and you have controller running:

Now we have OpenDaylight server installed with basic set of functionalities. In addition it is necessary to install additional features to have server which is appropriate for testing and using. Features installation is very simple at OpenDaylight server, you just have to execute feature:install command with features as arguments. This time we will install next features:
odl-restconf – feature for restconf protocol support for OpenDaylight users
odl-l2switch-switch – feature which gives layer 2 learning switch functionality to controller
odl-l2switch-switch – feature for api documentation
odl-dlux-all – GUI for OpenDaylight
When we have choosen all functionalities we can add it to controller by executing command for adding it:
opendaylight-user@root> feature:install odl-restconf odl-l2switch-switch odl-mdsal-apidocs odl-dlux-all
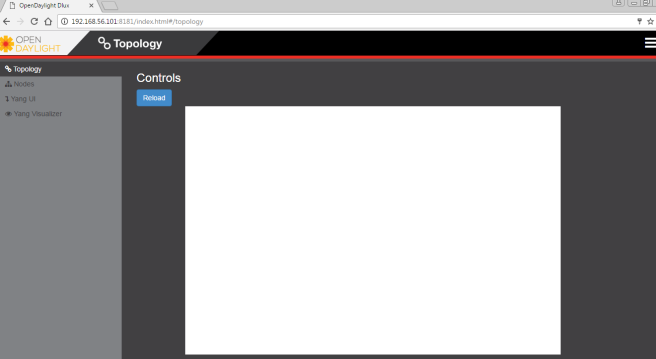
Now, we have OpenDaylight installed and we can start playing with it. To start GUI on controller open web browser and type next address:
http://192.168.56.101:8181/index.html
In our case 192.168.56.101 is address of host-only network adapter of our OpenDaylight Ubuntu server. This address should be pingable from our host computer. When we open this URL we have first page of OpenDaylight controller:

To log in type both admin as user and pass and we have home page of the controller:
Enjoy!

Hi, friends. I’m trying to run mininet with the Opendaylight remote controller. My problem is that I have already installed two releases (Magnesium-SR1 and Sodium-SR2) and neither of them let me install feature:install odl-dlux. In fact, nothing related to dlux lets me install it. How can I install the opendaylight graphic interface?
LikeLike
late but …
These are the features I installed and it got me where I needed:
odl-dlux-core
odl-dluxapps-nodes
odl-dluxapps-topology
odl-dluxapps-yangui
odl-dluxapps-yangvisualizer
odl-dluxapps-yangman
Be sure you enter them as separate commands using the feature:install command prior to each of them.
look here for detail https://stackoverflow.com/questions/44861707/not-able-to-install-the-gui-packageodl-dlux-all-related-to-opendaylight-carbon
luck
LikeLike